
Changing Apparent Perspective with Lenses

How far away are the mailboxes from the church in this small NH town?
The answer, rather surprisingly, is that in a picture you can make it seem any distance you want by changing the perspective!
“Perspective”– in the sense of the appearance to the eye of objects in respect to their relative distance and positions to one another — can be changed in a photograph. Any lens will show two objects at a given distance from each other, but it is possible to change that apparent distance. You can show a short row of mailboxes as a very small framing device against the church just behind them. Or you can uproot the mail boxes and move them much farther away from the church and spread them out so that they fill up the foreground and become the center of attention. How do we do that? There are two factors.
FOCAL LENGTH
If we use different focal lengths on a subject or subjects from where we happen to be standing — as with a zoom lens — the angle of view will change, and the subject(s) will be shown smaller or larger in the picture, but the perspective will remain the same. The subjects will be in the same relation to each other, and any gaps between them will appear exactly the same. However that gets boring pretty quickly. In order to change the entire perspective, the key is to change our position also.
POSITION
Changing position can produce radical changes in perspective. Moving nearer or farther away — at the same time using different angles of view to keep the subjects in the size we want for our composition — makes all the difference. Things can now begin to look very different!
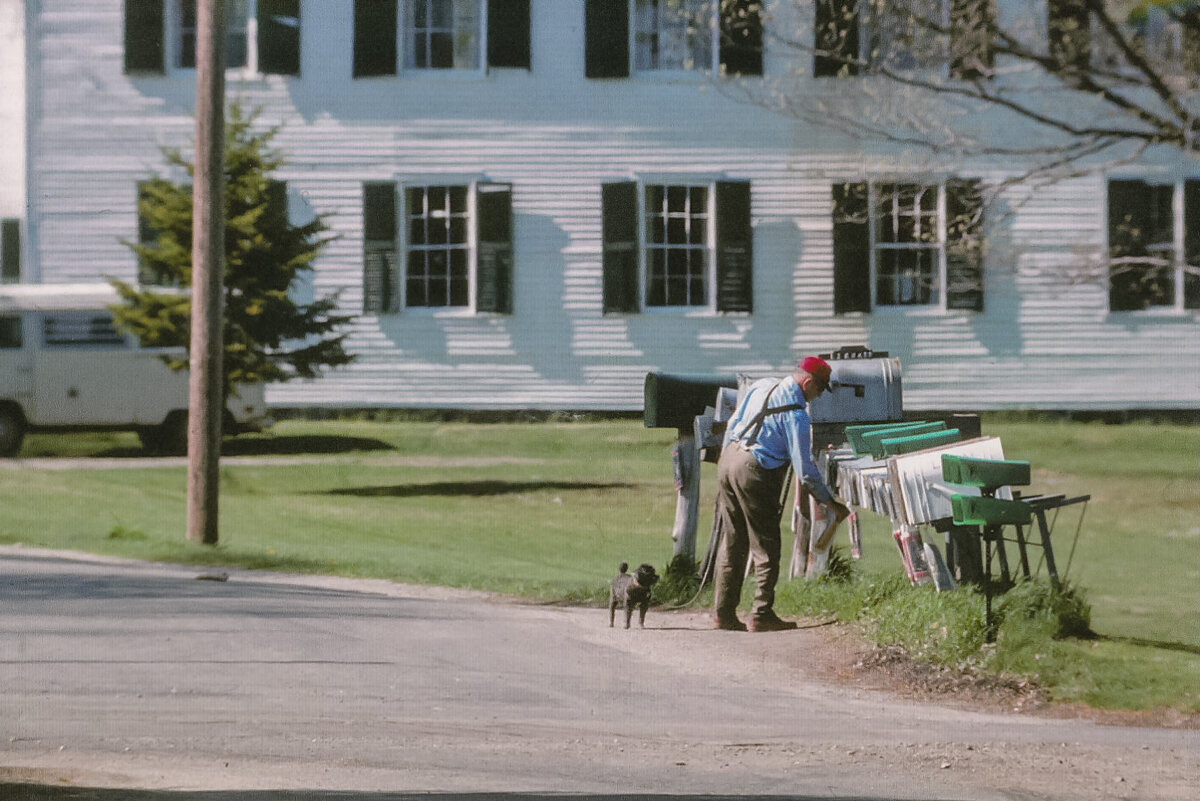
image 1: With a 400mm lens, showing a gentleman and his small dog collecting the daily paper hanging from his mail box. This short row of mail boxes is quite close to the church.
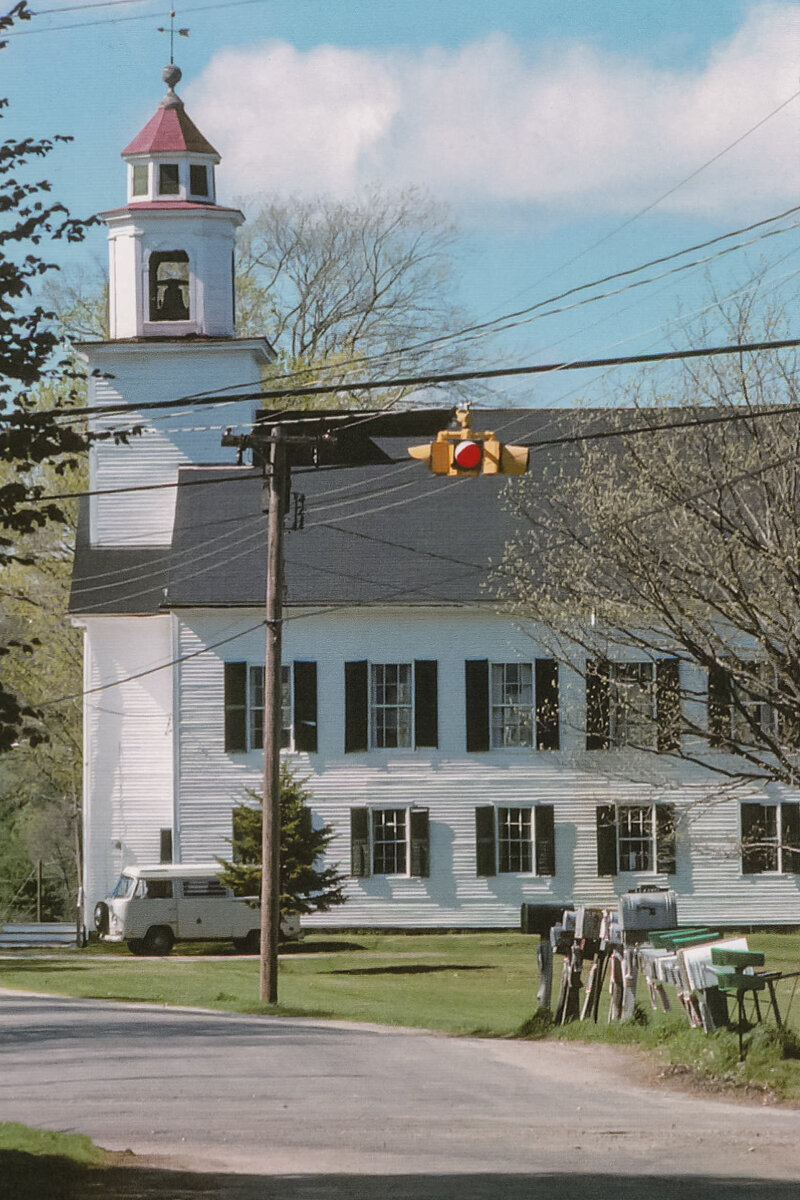
image 2: With a 135mm lens from the same camera position, but in vertical format to take in the whole church. Notice that although the frame is wider and we now see the whole of the church, the perspective and distance of the mailboxes relative to the church is exactly the same. So how can we change that apparent distance? We have to change our position.
image 3: With a 50mm lens, having moved considerably closer, and using the wider angle of view. Now the mail boxes appear to be quite a distance away from the church, to the point where both boxes and church are of about equal importance in the picture.
image 4: From a still closer position with a 35mm wide angle lens. The mail boxes are now the more important feature, with the church becoming smaller and farther away in the background.
image 5: Moving still closer with a 21mm lens, the mail boxes are now the major center of attention, and the church is way back there almost out of sight. The actual distance is best shown in the shot made with the 50mm lens, a little more than the distance between the two telephone poles. This is one reason the 50 is considered the "normal" focal length for a full-frame 35mm camera. It takes in a typical "scene" at about the same distance the eye can comfortably take it all in.
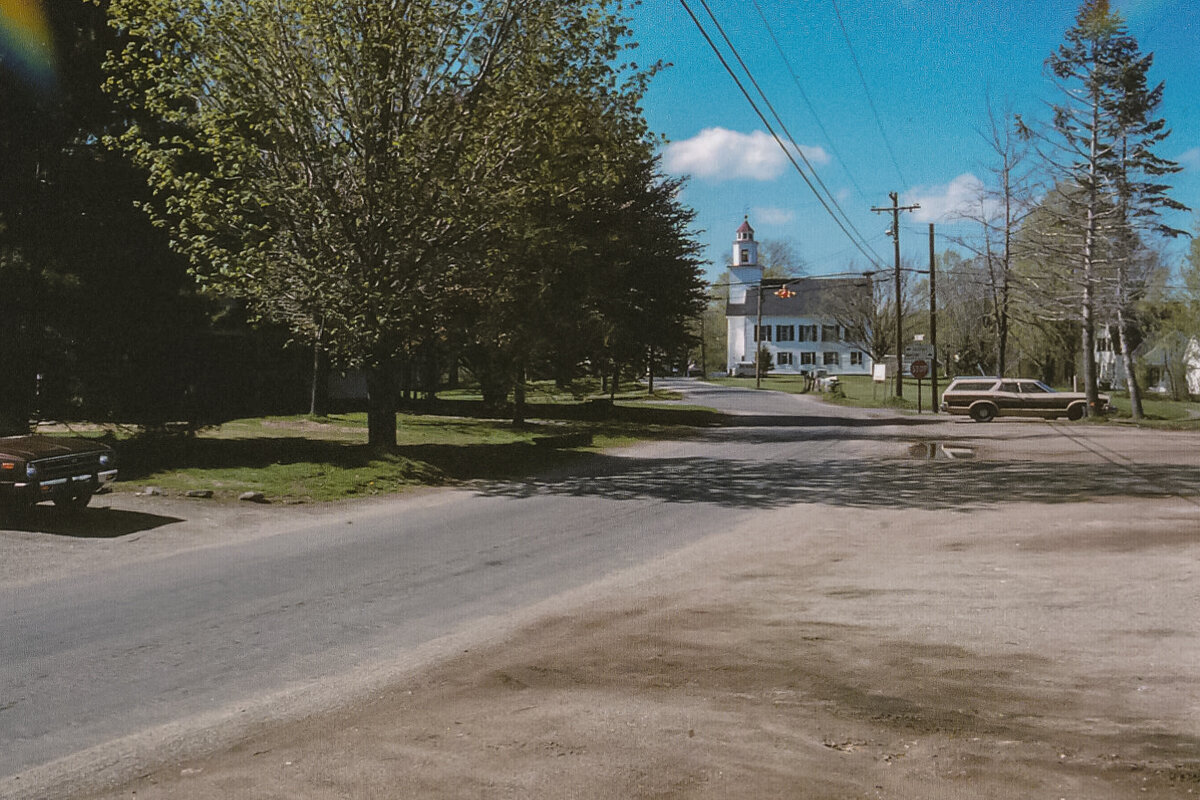
image 6: This is a picture of the whole scene from the exact same viewpoint of photos 1 and 2, but made with the 35mm lens. Notice the red stop sign which marks an intersection with the main road. It is shown in the same position against the church roof as in picture 2 with the 135, and the mailboxes are back close against the church just as they are in both pictures 1 and 2. This shot has the same technical "perspective" on them as with 400 and 135 from the same position. Only the angle of view has been changed to a wider angle. All three pictures could have been made with a 35 to 400 zoom lens.
The way to change the perspective is therefore to change position -- usually with a change in angle of view at the same time -- which can make pictures very much more interesting than just standing in one place using a zoom lens.
NOTE ON LENSES
The 135 and 50 and 35mm lenses were picked for this project because they were the very first focal lengths chosen by Oskar Barnack for the first interchangeable lens Leica I (C) of 1930, later appearing with standardized "0" lens mount in 1931, and finally with rangefinder coupling for the Leica II in 1932 The more modern 400 and 21mm lenses were added here to the early three focal lengths to provide comparison, but as you can see that early Leica trio can still show very effective change in perspective. In fact, virtually all competing camera companies coming afterwards made sure to copy those same three focal lengths.

image 7: Part of the fascination of the Leica system is the forward and backward compatibility of the equipment of different eras. All of these pictures could have been made with just about any Leica camera from 1931 to the present day, using lenses from different eras. For instance, the 400mm used in this article is the f/6.8 Telyt in its Visoflex version (1970 to 1984), usable with Visoflex II (1959 to 1983) or III (1963 to 1983). It is shown here with a 1950 Leica IIIc using the screw-mount version of Viso II. The Visoflex version of this 400 Telyt can therefore be used with any SM or M Leica. Or, with a Leica R adapter, it can be used with any Leicaflex or Leica R. Or it can be further adapted to most any digital SLR or ILC camera in use today that can provide a view through the lens.