Leica Auxiliary Reproduction Device Boowu
During the many years I was able to do restoration and rebuilding of historic aircraft one day a week at the New England Air Museum in Windsor Locks CT, a number of situations arose where visitors had actually had some long ago contact with the aircraft I was working on. Sometimes they had snapshots to show, and I needed a method of obtaining a quick copies for the museum's files rather than a studio setup. Today any cell phone might do the job instantly, but back then the solution was an old BOOWU. That solved the problem at the museum as well as on other research trips.
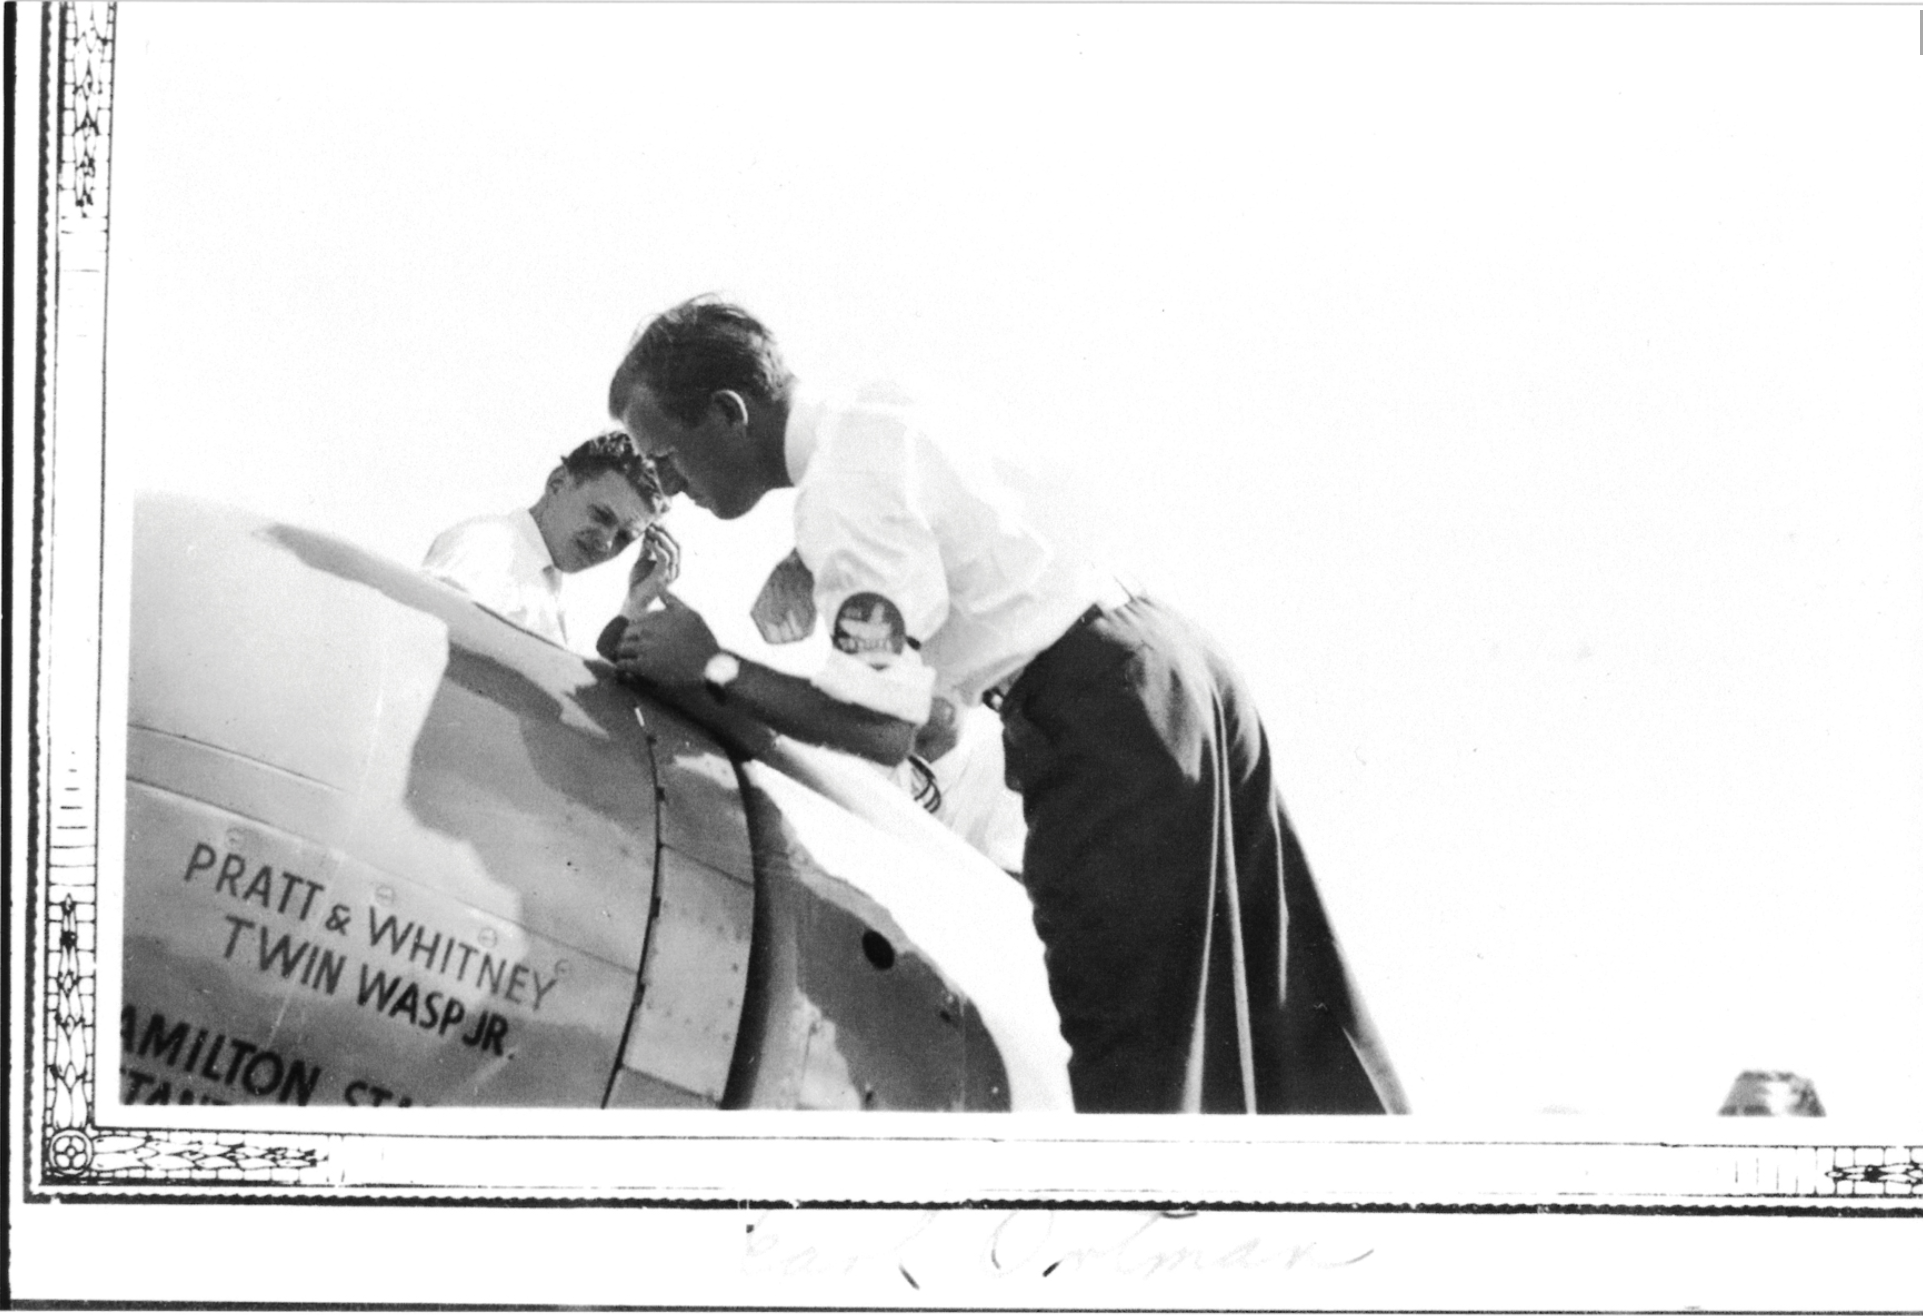
The snapshots with the handwriting underneath shown on the following pages came from someone who had access to the pits during the Thompson Trophy Race at Cleveland in 1938, and got photos of one of the leading contenders in the race -- the Marcoux-Bromberg Special -- as well as its pilot Earl Ortman. The small prints of Ortman and his airplane could be quickly and easily copied with the BOOWU at the 4x6 inch A6 setting.
This yellow and black aircraft was famous at the time, having placed second in the two previous years. It would have won in 1937 except for a miscue given to the pilot on the newly installed radio. And in its 1936 version it was featured in the film "Test Pilot" with Clark Gable and Spencer Tracy. The Marcoux placed second in 1938 and again in 1939, and ever since has been known as "The Bridesmaid". The New England Air Museum was able to retrieve the disassembled parts of the airplane from storage in a leaky garage in Michigan, and the restoration began on the wooden wings which were in very poor condition from water damage. This picture of the airplane in its final 1939 race version was made on roll-out after restoration with a contemporary Leica IIIa and 50mm f/2 Summar, to be properly in keeping with its date.
The BOOWU was originally designed for screw-mount cameras (1952 to 1962 -- dates from Collectors Guide, Laney), and and several M versions followed (1956 to 1976). The units can be pre-set for three standardized paper sizes:
A4 -- 8.25x11.5 in. -- approx. 8x10 or 8x11
A5 -- 5.75x 8.25 in. -- approx. 5x7 or 5x8
A6 -- 4.25x5.80 in. -- approx. 4x5 or 4x6
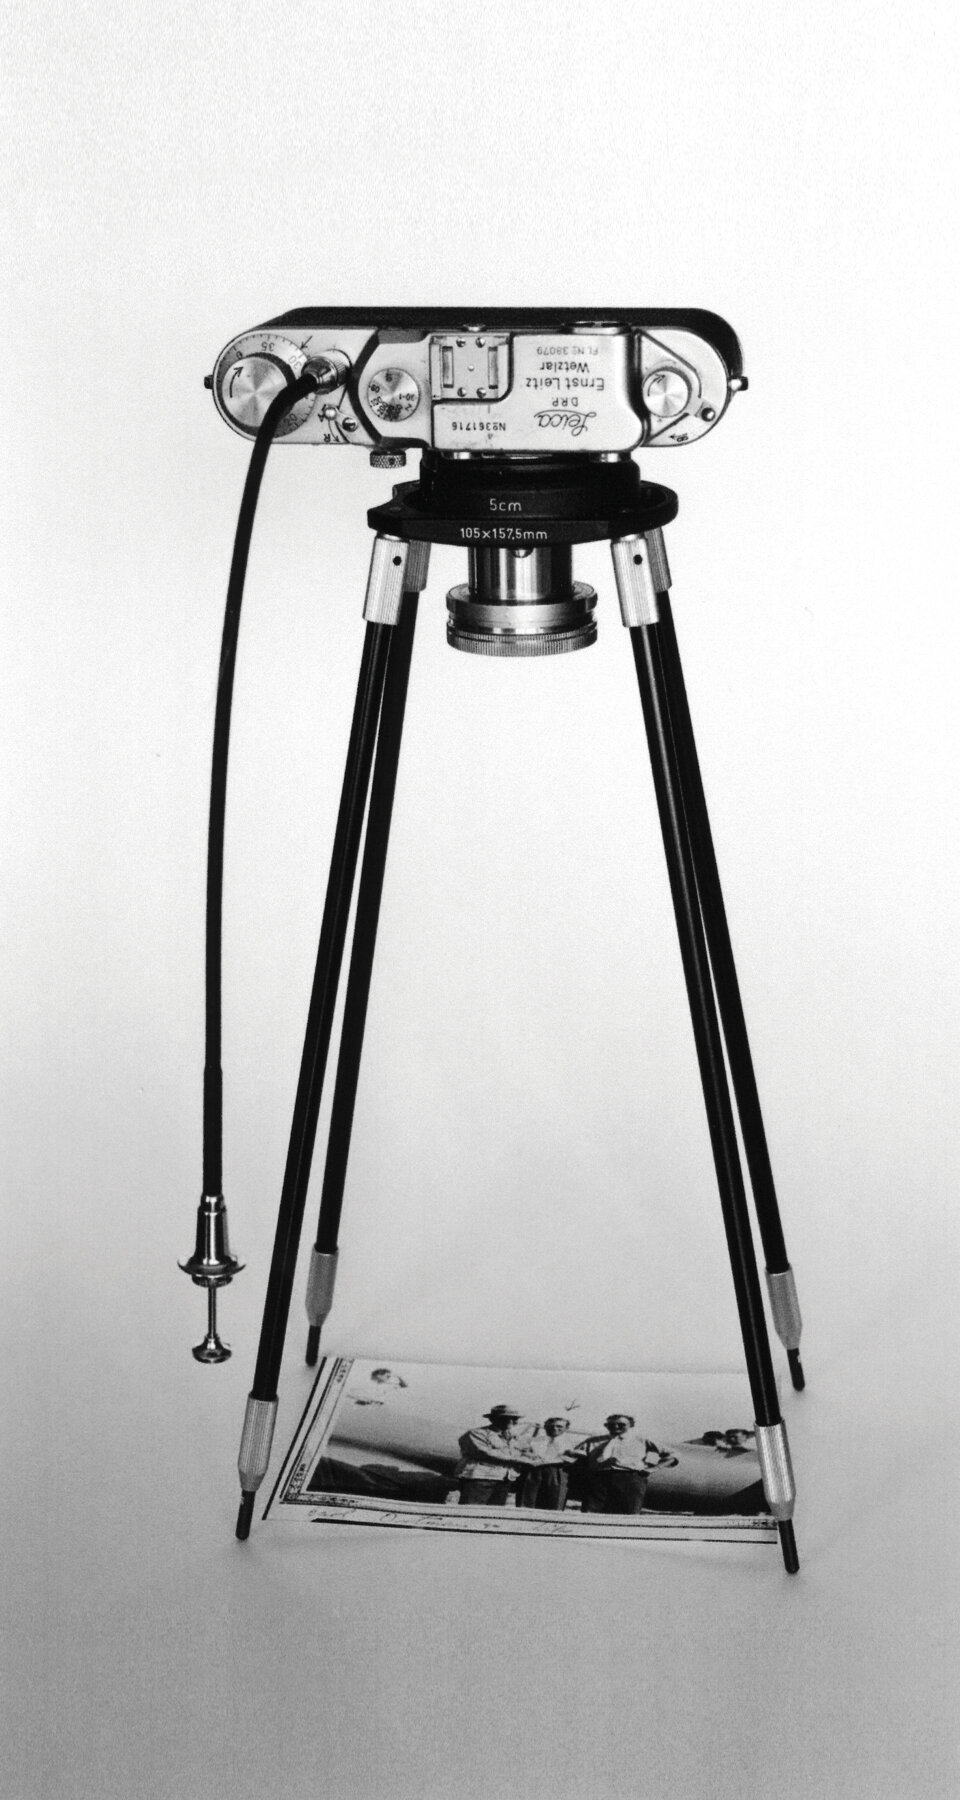
There are three extension tubes to be mounted on the camera, each one the proper thickness for accurate focus at its specified setting, with the lens focus set at infinity. Into the tubes are screwed the four extendible legs. The legs are adjustable to three marked clickstop extension settings for use with the proper extension tube, and are then clamped tight to prevent slipping.
The assembled setup is quite rigid, and can be easily set up for desktop copying. Back in the day I picked the screwmount BOOWU and have seen no reason to update it. Besides all the older screw-mount cameras, it can work with any bayonet mount M camera with the simple addition of a bayonet adapter to the camera, eliminating any problems with mounting as reported by Will Wright a few years ago when he found a newer M camera with thicker front levers would not mount on an older M-type extension tube designed for the earlier M3 and M2.
TIPS ON USING THE BOOWU
I found it convenient to dedicate a specific camera and lens to use with the BOOWU, making the unit self-contained and transportable. It uses screw-mount lenses, but even very old and inexpensive SM lenses will perform well at the smaller apertures, the instructions recommending an aperture of f/8 or f/11. And a dedicated camera will not need a neck strap attached, making it easier to work with on the stand. A hand-held light meter can be used quite conveniently on a gray card, or something similar, and the thin extension tubes do not require any added exposure factor. (Or, of course, a reading can be made through any metered M camera). With a SM camera, after taking the meter reading, set the fast and/ or slow speed dial on the camera -- here a IIIc -- by picking up the unit and looking down at the two dials from the top of the camera. That gives best visibility to the slow speed dial. Once the speed is set, then put the unit down into position to make the photograph. The four-legged setup permits very slow shutter speeds to be used steadily with a cable release.
If the prevailing lighting casts a shadow of one of the legs into the frame, that particular leg can be removed to provide more even illumination. The stand will stay upright, but I found it wise to keep a hand on the camera during exposure to make sure there is no shake. In fact, with all four legs in use, a steady hand on the camera will make sure an exposure as long as a full second can be made steadily even without a cable release. Just be sure that while under pressure the ends of the legs aren't making dents in any photos or papers beneath them. Otherwise use a cable release and no pressure.